Sony Dream Machine Instruction Manual: A Comprehensive Guide
Welcome! This manual details Sony’s Dream Machine‚ covering setup‚ radio‚ CD/tape operation‚ alarms‚ sound‚ and troubleshooting for optimal enjoyment of your device.
Understanding Your Sony Dream Machine
Your Sony Dream Machine is a versatile audio system designed to provide a comprehensive entertainment experience. It typically integrates multiple functionalities‚ including AM/FM radio reception‚ a CD player‚ and often‚ a cassette tape deck. Modern iterations frequently incorporate advanced features like digital clock displays‚ programmable alarms‚ and customizable sound settings.
The core purpose of the Dream Machine is to deliver high-quality audio playback and reliable timekeeping. Understanding its various components – the radio tuner‚ disc loading mechanism‚ tape transport (if present)‚ and speaker system – is crucial for effective operation. Many models also boast connectivity options‚ allowing for external audio sources to be connected.
This system is engineered for user-friendliness‚ offering intuitive controls for navigating its features. Familiarizing yourself with the front panel buttons‚ remote control (if included)‚ and menu options will unlock the full potential of your Dream Machine. Proper understanding ensures a seamless and enjoyable listening experience.
Model Variations and Identification
Sony Dream Machines encompass a diverse range of models‚ each with unique features and specifications. Identifying your specific model is the first step towards accessing tailored support and documentation. Look for a model number and serial number typically located on the rear panel or bottom of the unit. This information is crucial when contacting Sony customer support or searching for online resources.
Variations exist in terms of included components – some models feature a tape deck‚ while others prioritize CD playback or digital connectivity. Speaker configurations also differ‚ ranging from integrated stereo speakers to outputs for external systems. Newer models may incorporate Bluetooth or Wi-Fi capabilities for wireless audio streaming.
Referencing the model number will clarify the available functionalities and compatibility with accessories. Sony’s website provides detailed specifications for each Dream Machine model‚ enabling you to understand its capabilities fully. Accurate identification ensures you utilize the correct instruction manual and troubleshooting guides.
Initial Setup and Component Checklist
Before operating your Sony Dream Machine‚ ensure all components are present. The package should include the main unit‚ a power cord‚ and potentially a remote control (depending on the model). Some units may also contain an FM wire antenna for improved radio reception. Carefully unpack all items and inspect them for any visible damage.
Position the Dream Machine on a stable‚ level surface‚ allowing adequate ventilation around the unit. Connect the power cord to a suitable electrical outlet. If using an external antenna‚ attach it securely to the designated input on the rear panel. For models with speaker outputs‚ connect your desired speakers using appropriate cables.
Verify all connections are firm and secure before powering on the device. Retain the packaging and documentation for future reference or potential warranty claims. A complete component checklist helps guarantee a smooth and trouble-free initial setup experience.
Powering On and Basic Operations
To power on your Sony Dream Machine‚ locate the power button – typically found on the front or top panel. Press the button firmly; a light indicator will illuminate‚ confirming the unit is active. The display should also light up‚ showing the current time or a welcome message.
Basic operations are controlled via buttons on the unit or the remote control. Volume adjustment is usually managed with dedicated volume up and down buttons. Source selection allows you to switch between radio (AM/FM)‚ CD player‚ and tape deck (if equipped).
Navigation buttons‚ often labeled with arrows‚ are used to browse through menus and select options. The ‘Enter’ or ‘Play’ button initiates playback‚ while ‘Stop’ and ‘Pause’ control the current audio. Familiarize yourself with these core functions for seamless operation.
Clock Setting and Time Display
Setting the correct time is crucial for alarm functionality. To adjust the clock‚ locate the ‘Clock Set’ or ‘Time Set’ button – its location varies by model. Press and hold this button; the hour digits will begin to flash. Use the tuning dial or arrow buttons to set the correct hour.
Press the ‘Clock Set’ button again to confirm the hour and move to the minute setting. Repeat the process to adjust the minutes. Some models offer a 24-hour/12-hour display option‚ accessible through the settings menu.
The time is typically displayed prominently on the unit’s screen. Ensure the display is clear and visible. If the display is dim‚ check for a brightness adjustment setting. Accurate timekeeping ensures reliable alarm operation and a convenient user experience.
Radio Functionality: AM/FM Tuning
To access radio functionality‚ first‚ ensure the unit is powered on and select the ‘Radio’ source using the source button. Rotate the tuning dial to scan through available AM and FM stations. For precise tuning‚ use the arrow buttons for fine adjustments.
The Dream Machine typically features preset tuning capabilities. To store a station‚ tune to the desired frequency and press the ‘Memory’ or ‘Preset’ button. Select an available preset number. Repeat this process to save your favorite stations.
To recall a preset station‚ simply press the corresponding preset number. The antenna position impacts reception; adjust it for optimal signal strength. Explore the ‘Seek’ function for automatic station scanning.
CD Player Operation and Features
To begin‚ ensure the unit is powered on and select the ‘CD’ source. Open the CD tray by pressing the ‘Open/Close’ button. Insert a CD with the label side facing up. The tray will automatically close‚ and the CD will begin to play.
Utilize the playback controls – Play/Pause‚ Stop‚ Skip Forward/Backward – for navigation. Many Dream Machines offer programmable CD playback‚ allowing you to create a custom track order. Consult the display for track information.
Explore features like repeat (one track or all tracks) and shuffle play for varied listening experiences. Ensure the CD surface is clean and free of scratches for optimal performance. If a CD is unreadable‚ try cleaning it gently with a soft cloth.
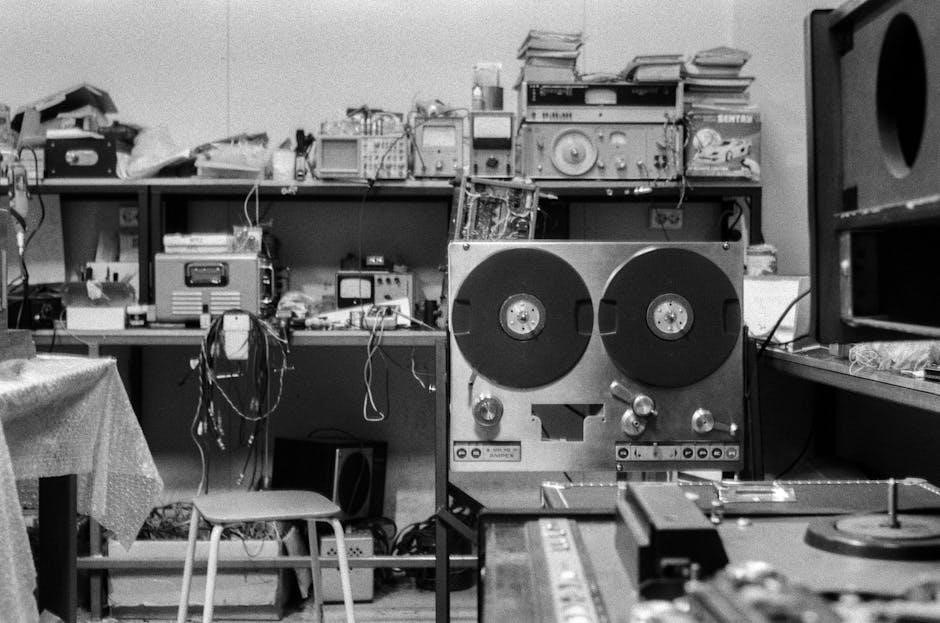
Tape Deck Usage (If Applicable)
If your Sony Dream Machine includes a tape deck‚ begin by opening the cassette compartment. Gently insert a cassette tape with the open side facing down. Ensure the tape is fully inserted and the door closes securely.
Select the ‘Tape’ source on your Dream Machine. Utilize the standard tape deck controls: Play‚ Pause‚ Stop‚ Fast Forward‚ and Rewind. The Fast Forward and Rewind functions allow you to quickly locate specific points on the tape.
Some models feature automatic tape type detection (Normal‚ Chrome‚ Metal) for optimized sound quality. If not automatic‚ manually select the correct tape type. Regularly clean the tape heads with a cotton swab and isopropyl alcohol to maintain optimal playback and recording quality.
Cassette Insertion and Playback
To insert a cassette‚ locate the tape compartment door on your Sony Dream Machine and gently open it. Insert the cassette tape with the exposed tape side facing downwards. Push it in until you feel slight resistance‚ ensuring it’s fully seated within the mechanism. Close the compartment door securely; it should latch automatically.

Select the ‘Tape’ source using the source selector button on the front panel. Press the ‘Play’ button to begin playback. Use ‘Pause’ to temporarily halt the tape‚ and ‘Stop’ to fully disengage the mechanism. Utilize ‘Fast Forward’ and ‘Rewind’ for navigating the tape.
For optimal sound‚ ensure the tape head is clean. Regularly demagnetize the head to reduce unwanted noise. If playback is distorted‚ try cleaning the tape path and checking the tape itself for damage.
Recording from Radio or CD
To record onto cassette‚ first‚ insert a blank cassette tape as detailed in the previous section. Select either ‘Radio’ or ‘CD’ as your source using the source selector. Tune to your desired radio station or begin CD playback. Ensure the tape compartment door is securely closed.
Press the ‘Record’ button. Simultaneously‚ press the ‘Play’ button to initiate recording. The Dream Machine will now record the selected source onto the cassette. Monitor the recording levels using the level meters‚ if available‚ to prevent distortion.
To stop recording‚ press either the ‘Stop’ button or the ‘Record’ button again. Remember to always eject the cassette after recording to prevent tape damage. Regularly check the tape head for cleanliness to maintain recording quality.
Alarm Clock Settings and Functions
The Sony Dream Machine boasts versatile alarm functionalities. To set the alarm‚ press the ‘Alarm Set’ button. Use the number buttons to input your desired alarm time‚ paying attention to AM/PM selection. Confirm your selection by pressing ‘Alarm Set’ again. The alarm indicator will illuminate‚ confirming activation.
You can choose your alarm source – radio or buzzer – using the ‘Alarm Source’ button. If selecting radio‚ ensure a station is tuned before setting the alarm. Adjust the alarm volume using the volume control buttons. The Dream Machine allows for gradual wake-up with increasing volume‚ if supported by your model.
To disable the alarm‚ press the ‘Alarm Set’ button until the alarm indicator turns off. Always verify the alarm is off to avoid unintended wake-up calls!
Multiple Alarm Configuration
Many Sony Dream Machine models offer the convenience of setting multiple alarms‚ ideal for varied schedules. To configure a second alarm‚ typically you’ll press an ‘Alarm 2’ or ‘Multi-Alarm’ button. The process mirrors the initial alarm setup: input the desired time using the number keys‚ select AM/PM‚ and confirm.
Each alarm can be independently configured with a different wake-up source – radio‚ buzzer‚ or even a CD track on supported models. Volume levels are also individually adjustable for each alarm. Some Dream Machines allow assigning specific days of the week to each alarm‚ enabling weekday and weekend alarm differentiation.
Carefully review your model’s specific instructions‚ as activation methods for multiple alarms can vary. Ensure each alarm indicator is clearly displaying its active status.
Snooze Function and Adjustments
The snooze function on your Sony Dream Machine allows for a few extra minutes of sleep before waking fully. Typically‚ pressing the ‘Snooze’ button after the alarm sounds will temporarily silence the alarm for a pre-set duration‚ commonly nine minutes‚ but this is adjustable on some models.
To adjust the snooze interval‚ consult your specific model’s manual. Some Dream Machines offer options for shorter or longer snooze periods‚ or even a customizable duration. Repeatedly pressing the snooze button will reactivate the alarm at the adjusted interval each time.
Be mindful of the maximum number of snoozes allowed; some models limit the number of times you can snooze before the alarm deactivates entirely. Familiarize yourself with these settings to avoid unintentionally sleeping through important commitments.
Sound Settings and Equalization
Your Sony Dream Machine offers various sound settings to personalize your listening experience. Basic adjustments typically include volume control‚ and often a dedicated ‘Sound’ or ‘Audio’ button accesses preset equalization modes like ‘Clear Bass’‚ ‘Dynamic’‚ or ‘Soft’. These presets cater to different music genres and listening preferences.
More advanced models may feature customizable equalization settings‚ allowing you to fine-tune specific frequency bands (bass‚ mid-range‚ treble) to achieve your desired sound profile. Explore these options to enhance clarity‚ warmth‚ or punchiness.
Consider the speaker placement and room acoustics when adjusting sound settings. Experiment with different settings to find the optimal balance for your environment. Some units also include a headphone jack for private listening.

Speaker System and Connections
The Sony Dream Machine typically incorporates a built-in stereo speaker system‚ designed for convenient‚ all-in-one audio playback. Speaker quality varies between models‚ with higher-end units often featuring larger drivers and enhanced acoustic designs for richer sound. Some models offer a headphone jack for private listening‚ automatically disabling the internal speakers when in use.
External audio connections may include an auxiliary input (AUX) allowing connection of external devices like smartphones or MP3 players. Certain models might also feature RCA output jacks‚ enabling connection to external amplifiers or powered speakers for increased volume and fidelity.
Carefully check the rear panel of your Dream Machine to identify available connection options. Ensure proper cable connections for optimal audio performance.

Remote Control Overview and Usage

The Sony Dream Machine remote control provides convenient‚ wireless operation of your unit. Key buttons include power‚ volume up/down‚ source selection (Radio‚ CD‚ Tape)‚ tuning (for radio)‚ play/pause‚ stop‚ fast forward/rewind‚ and alarm set/cancel. Numerical buttons allow direct track or station selection.
The ‘Display’ button toggles the information displayed on the unit’s screen. ‘Sound Effect’ or ‘EQ’ buttons access preset equalization modes. The ‘Alarm’ button allows quick access to alarm settings. Some remotes feature a ‘Dimmer’ control for adjusting display brightness.
To operate‚ ensure the remote has fresh batteries (typically AAA size). Point the remote directly at the Dream Machine’s sensor. Obstructions can interfere with the signal. Refer to the diagram within this manual for button identification.

Troubleshooting Common Issues
Problem: No power. Solution: Verify the unit is plugged into a working outlet. Check the power cord for damage. If using batteries‚ ensure they are installed correctly and are not depleted.
Problem: Radio reception is poor. Solution: Adjust the antenna position; Try different locations for the Dream Machine. Ensure no large metal objects obstruct the antenna.
Problem: CD player won’t play. Solution: Ensure the disc is inserted correctly‚ label side up. Clean the disc with a soft cloth. Try a different CD to rule out disc issues.
Problem: Alarm doesn’t sound. Solution: Confirm the alarm is set correctly and the volume is audible. Check the power source is stable. Ensure the alarm mode (radio or buzzer) is selected.
No Sound Troubleshooting
Issue: Complete silence from the unit. Check 1: Verify the volume control isn’t set to minimum. Gradually increase the volume to a comfortable level. Check 2: Ensure the correct input source is selected (Radio‚ CD‚ Tape). Accidentally selecting the wrong source can cause silence.
Issue: Sound is distorted or weak. Check 1: Examine speaker connections. Ensure they are securely attached. Loose connections can lead to intermittent or poor sound quality. Check 2: Test with headphones. If sound is normal through headphones‚ the speakers may be faulty.
Issue: Sound only from one speaker. Check: Inspect speaker wires for damage or disconnection. A broken wire can disable one speaker. Consider professional repair if the issue persists.
CD/Tape Playback Problems
Issue: CD won’t load or eject. Check 1: Ensure the disc is correctly oriented (label side up). Check 2: Verify the disc is clean and free of scratches. Damaged discs may not play. Check 3: If the problem persists‚ gently try to eject the disc manually (consult service manual if needed).
Issue: Tape playback is muffled or distorted. Check 1: Clean the tape heads with a head cleaner. Dirty heads can degrade sound quality. Check 2: Try a different tape. The original tape may be damaged or of poor quality.
Issue: Playback stops unexpectedly. Check: Ensure the tape isn’t tangled or jammed. Rewind and fast-forward to check for issues. A faulty tape may cause interruptions.
Remote Control Malfunctions
Issue: Remote control is unresponsive. Check 1: Replace the batteries with fresh ones‚ ensuring correct polarity (+/-). Weak batteries are a common cause. Check 2: Ensure there’s a clear line of sight between the remote and the Dream Machine’s sensor. Obstructions can interfere with the signal.
Issue: Some buttons don’t work. Check 1: Clean the remote’s contact buttons with a soft‚ dry cloth. Dirt or debris can prevent proper contact. Check 2: Test the buttons by pressing firmly and directly.
Issue: Remote works intermittently. Check: Interference from other electronic devices might be the cause. Try moving the Dream Machine away from potential sources of interference. If problems persist‚ consider resetting the remote (refer to the full manual).
Cleaning and Maintenance

Exterior Cleaning: Use a soft‚ dry cloth to gently wipe the Dream Machine’s exterior. Avoid harsh chemicals‚ abrasive cleaners‚ or excessive moisture‚ as these can damage the finish. A slightly damp cloth can be used for stubborn marks‚ but ensure it’s wrung out thoroughly.
CD/Tape Deck Cleaning (if applicable): Regularly clean the CD/tape deck lens with a commercially available CD/lens cleaner. This ensures optimal playback quality. For tape heads‚ use a head cleaning cassette periodically to remove oxide buildup.
Speaker Grills: Dust speaker grills with a soft brush or vacuum cleaner attachment. Avoid pushing debris into the speaker cones. Regular cleaning maintains sound clarity. Store the Dream Machine in a dry‚ dust-free environment when not in use.
Battery Replacement and Disposal
Battery Type: Your Sony Dream Machine utilizes standard AA batteries for clock backup and alarm functionality. Check the battery compartment for the correct voltage and quantity required – typically 2 x AA.
Replacement Procedure: Always replace batteries with the same type. Open the battery compartment (usually located on the rear panel) and insert new batteries‚ observing the correct polarity (+ and -). Ensure a secure connection.
Disposal Information: Dispose of used batteries responsibly. Do not discard them with general household waste. Batteries contain hazardous materials and should be recycled at designated collection points. Check your local regulations for proper battery disposal procedures. Improper disposal can harm the environment.
Safety Precautions and Warnings
Important Safety Instructions: To ensure safe operation‚ read all instructions before use. Avoid exposure to moisture and extreme temperatures. Do not disassemble or modify the Dream Machine; this voids the warranty and may cause electric shock.
Power Source: Use only the specified power adapter. Incorrect voltage can damage the unit. Keep the power cord away from heat sources and sharp objects. Unplug the unit during prolonged periods of non-use and thunderstorms.
General Precautions: Do not insert objects into the ventilation slots. Clean with a soft‚ dry cloth; avoid using solvents. If you notice smoke or a strange odor‚ immediately unplug the unit and contact Sony support. This device complies with safety standards; however‚ responsible usage is crucial.
Warranty Information and Support
Limited Warranty: Your Sony Dream Machine is covered by a one-year limited warranty against defects in materials and workmanship from the date of purchase. This warranty does not cover damage caused by misuse‚ accidents‚ or unauthorized modifications.
Warranty Service: To obtain warranty service‚ contact Sony customer support with your model number and proof of purchase. You may be required to ship the unit to an authorized service center for repair or replacement. Shipping costs are the responsibility of the customer.
Customer Support: For assistance‚ visit the Sony support website or call our toll-free number. Online resources include FAQs‚ troubleshooting guides‚ and downloadable manuals. We are committed to providing excellent customer service and resolving any issues you may encounter.